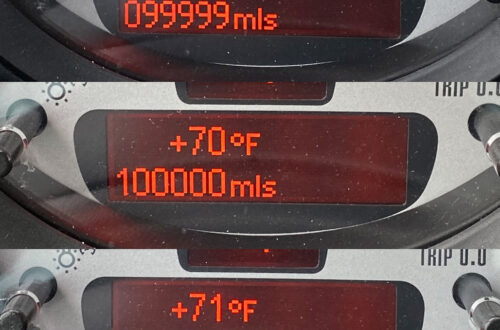
After 6 1/2 years and just over 87,000 miles, the original battery in my 2013 MINI Cooper S Clubman finally bit the dust. What I initially thought would be a straight forward battery replacement, quickly became a bit muddled. Depending on the options a Gen2 MINI is equipped with, replacing the battery can be a bit more involved.
So here is a write-up of what I learned while replacing the battery in my MINI, so hopefully it helps some of you down the road.
Battery Information
Most Gen2 MINIs seem to have come from the factory with absorbed glass mat (AGM) type batteries, instead of the traditional lead-acid type batteries. But before buying a replacement battery, you want to verify the type and the specs of the OEM battery in your MINI. Note the following information…
- Group Size: H6/Group 48 is OEM size (at least on my 2013 Clubman)
- Ah (ampere-hours): The energy storage capacity of the battery.
- CA (cranking amperes): The amount of current a battery can provide at 0º C.
- CCA (cold cranking amperes): The amount of current a battery can provide at -18º C.
- RC (reserve capacity): The length of time a battery can deliver 25 amps, before it’s voltage drops below 10.5 V.
Once you have the type and specs your MINI battery, you can find a replacement battery. The specs of the new battery should meet or exceed the values you noted above of the OEM battery. For example, if you live in the upper Midwest, and get harsh winters, you won’t be disappointed getting a battery that provides more cold cranking amps (CCA). There are plenty of AGM battery options out there which fit the Gen2 MINI, and most can be had in the $160-$200 range.
Intelligent Battery Sensor & Battery Registration
Once you sort out the battery, you need to determine if your MINI is equipped with an Intelligent Battery Sensor (IBS). The IBS module is located on the terminal end of the negative battery cable.
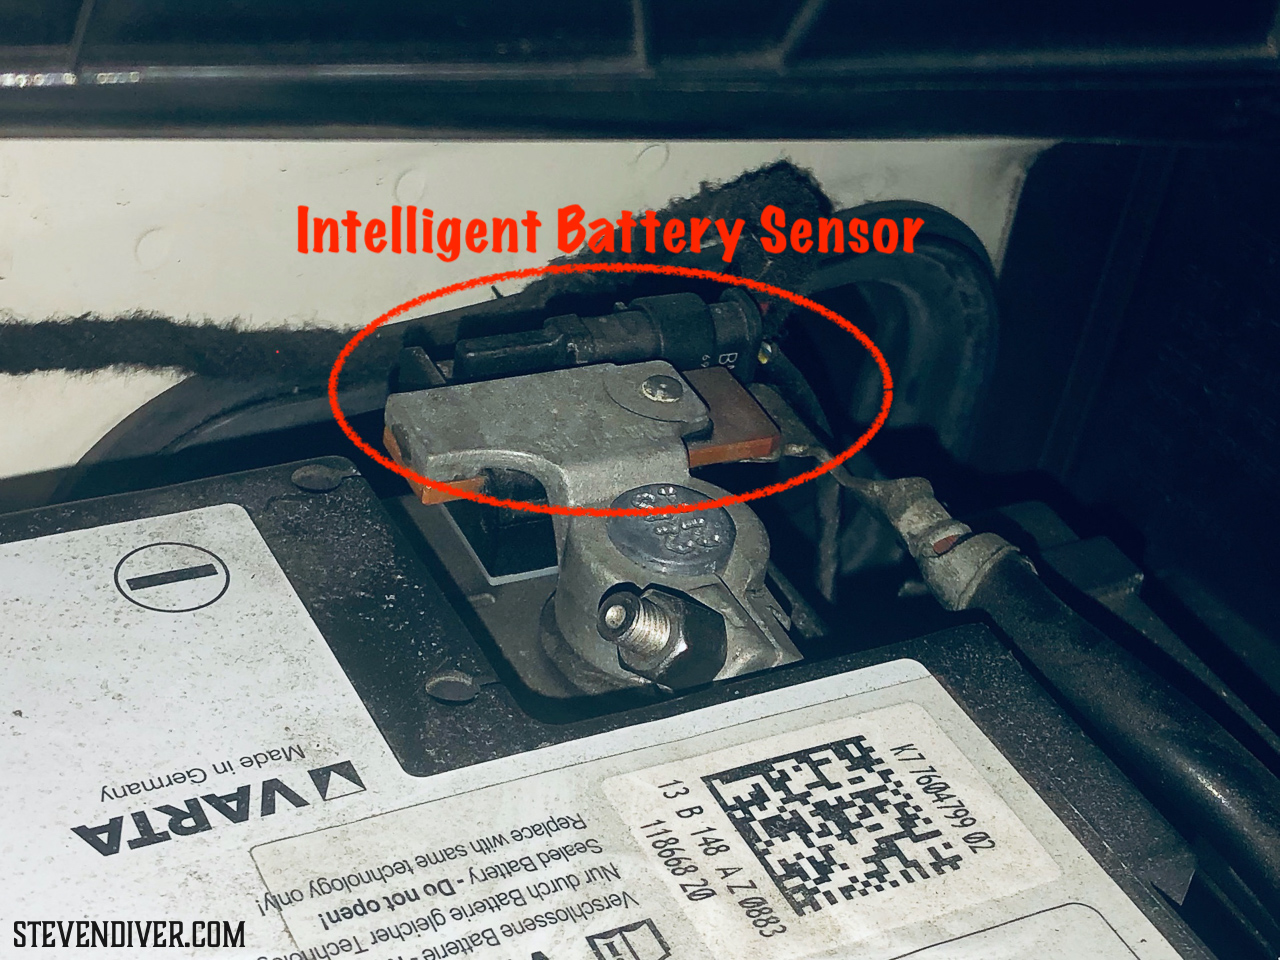
If your MINI has an IBS module, the new battery will need to be registered to the car once installed. If you’ve never heard of this, you’re probably having the same reaction I didn’t initially…WTF?!? But as I read more about it, I started to understand…
The IBS will tailor charging to the age, output, etc. of the battery. For example, as a battery ages, and requires more power to recharge, your MINI will provide more electrical power to recharge the battery. I’ve also read that non-essential systems can be shutdown or de-prioritized for power usage as a battery ages (I’m not sure on the validity of that one, but I’ve read it in multiple places). Registering a new battery tells your MINI it has a new battery, erases the old charging memory, and recalibrates electrical components and sensors for use with the new battery. This is especially important for AGM batteries, as they are more susceptible to damage from over-charging…which could happen if the car does not know about a new battery, and continues to charge thinking it’s an older battery.
If your MINI does not have an IBS module, lucky you, just replace the battery, and get back to motoring…no registration of the battery is necessary.
When it comes to registering the new battery with the car, any MINI dealer or decent independent shop will be able to do this (and be happy charging you for maybe 5 minutes worth of parts & labor). But you’re here because you want to DIY this job. Depending on how much you want to spend, there are several scanner tools, as well as OBD2 adapters and software available to do this job.
Now that we’ve got that information, and covered the gist of what needs to be done, let’s get onto the actual process of replacing the battery, as well as the process I used for registering the new battery.
Tools/Supplies Needed for Battery Replacement
- New Battery
- 10mm socket for plastic battery cover, battery retaining bolt, & battery terminal nuts
- Socket extension (not necessary, but makes life easier on one of the plastic battery cover bolts)
- Rubber gloves
- Eye/Facial protection
- Towels/rags/cleaning supplies
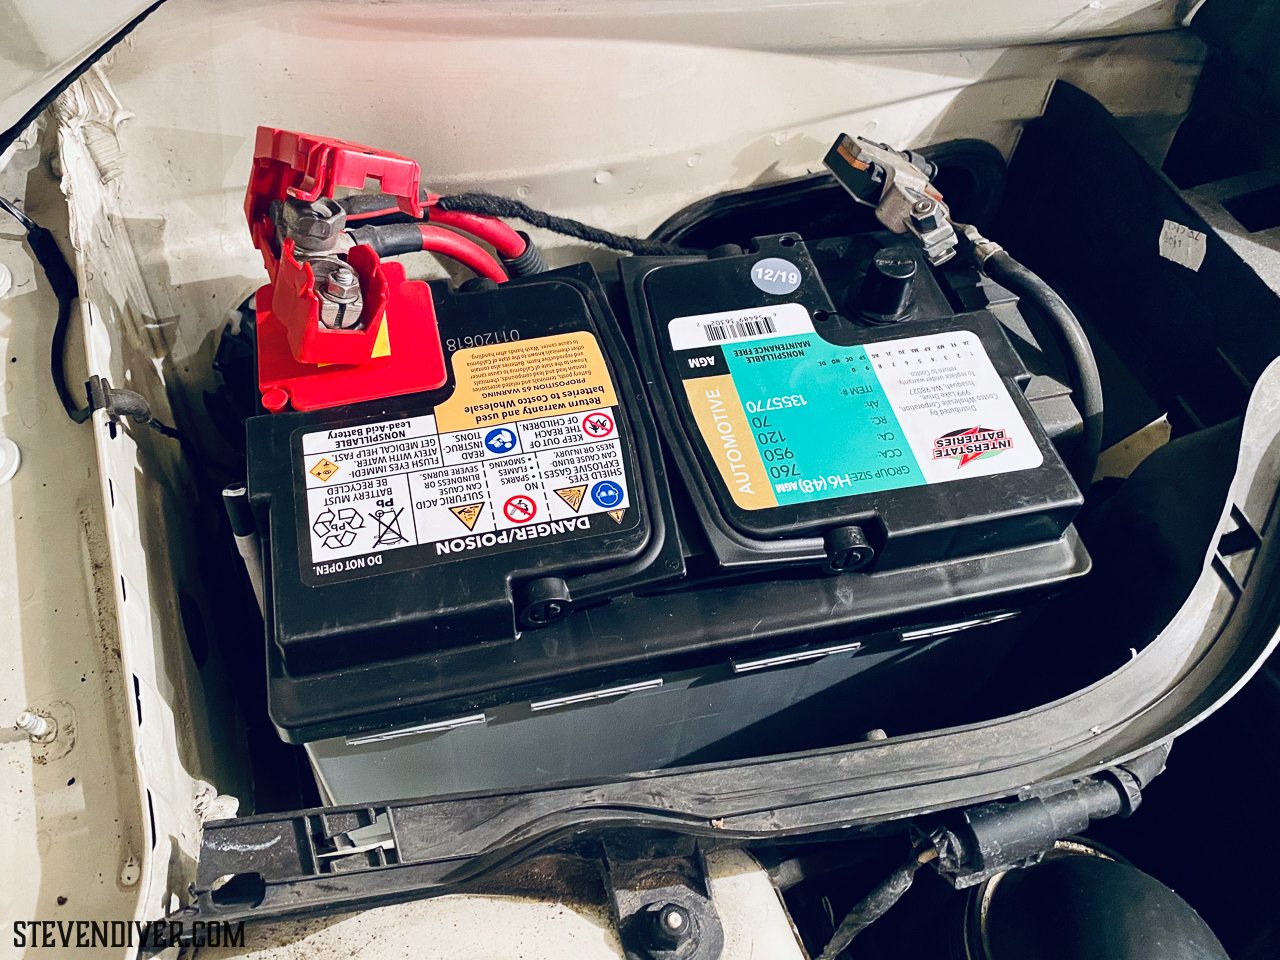
Note: After searching around, I found this Interstate Batteries H6 (48) AGM battery (Group Size: H6/Group 48, 70 Ah, 950 CA, 760 CCA , RC 120 Minutes), which exceeded the specs of OEM VARTA AGM battery (Group Size: H6/Group 48, 60 Ah, 680 CA, 680 CCA , RC 100 Minutes) in my Clubman, for less than $200 at Costco.
Tools/Supplies Needed for Battery Registration (If Necessary)
- iPhone (or Android)
- Carly app for iPhone (BMW/MINI In-App Purchase/Upgrade required)
- Carly Universal Adapter (iOS/Android)
Battery Replacement Instructions
First things first, put on a pair of rubber gloves and some eye/facial protection.
DISCLAIMER: Batteries can (and do) explode from time to time. They contain sulfuric acid, which can and will REALLY ruin your day if it gets in your eyes or on your face…as in you’ll be blind and disfigured. At minimum, wear some eye protection.
Step 1: Open the Hood & Locate the Battery
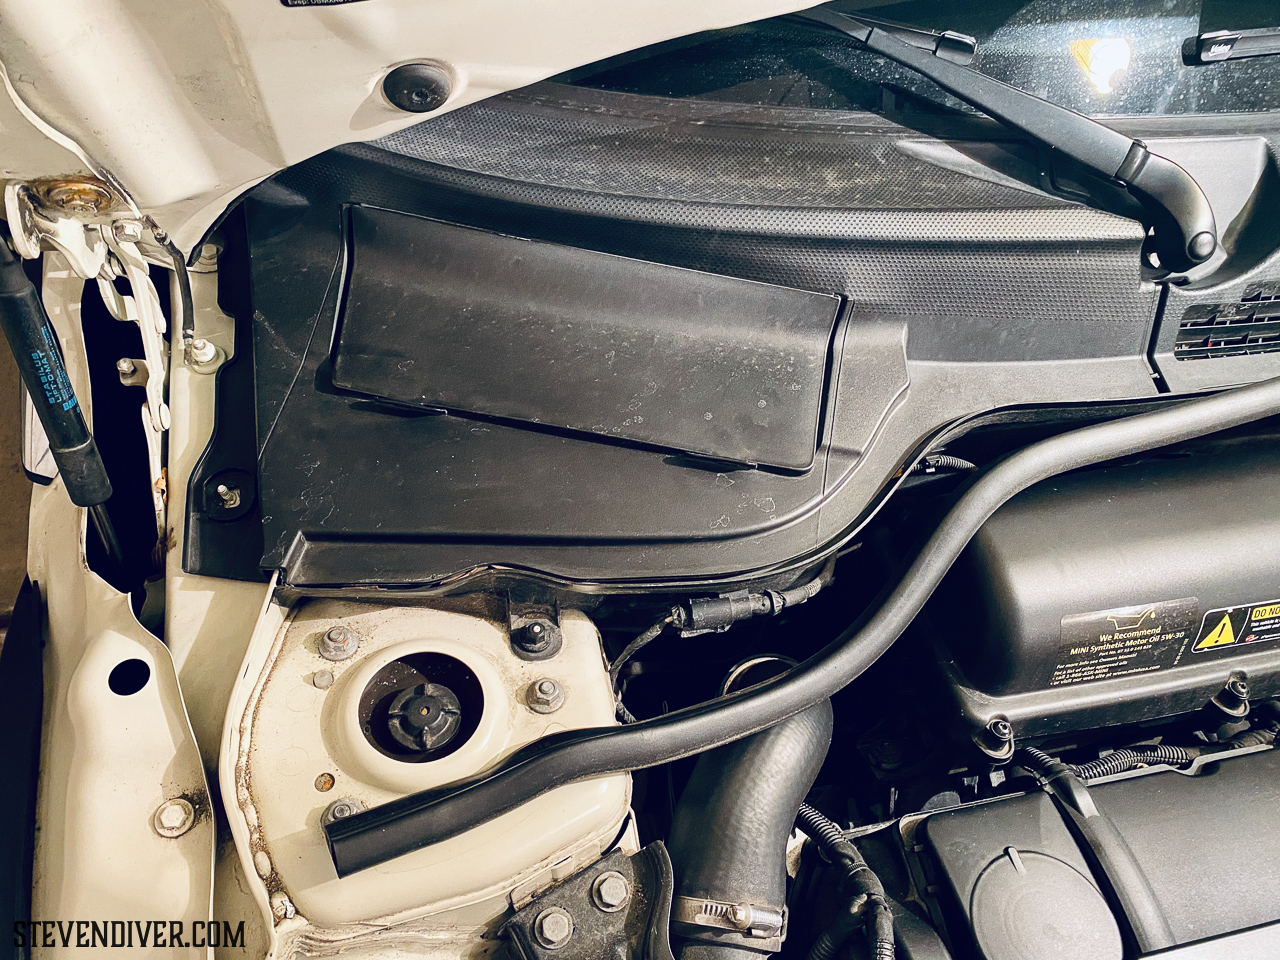
Open the hood, and locate the battery. It is under a plastic panel at the back of the engine compartment (on the passenger side, at the base of the windshield).
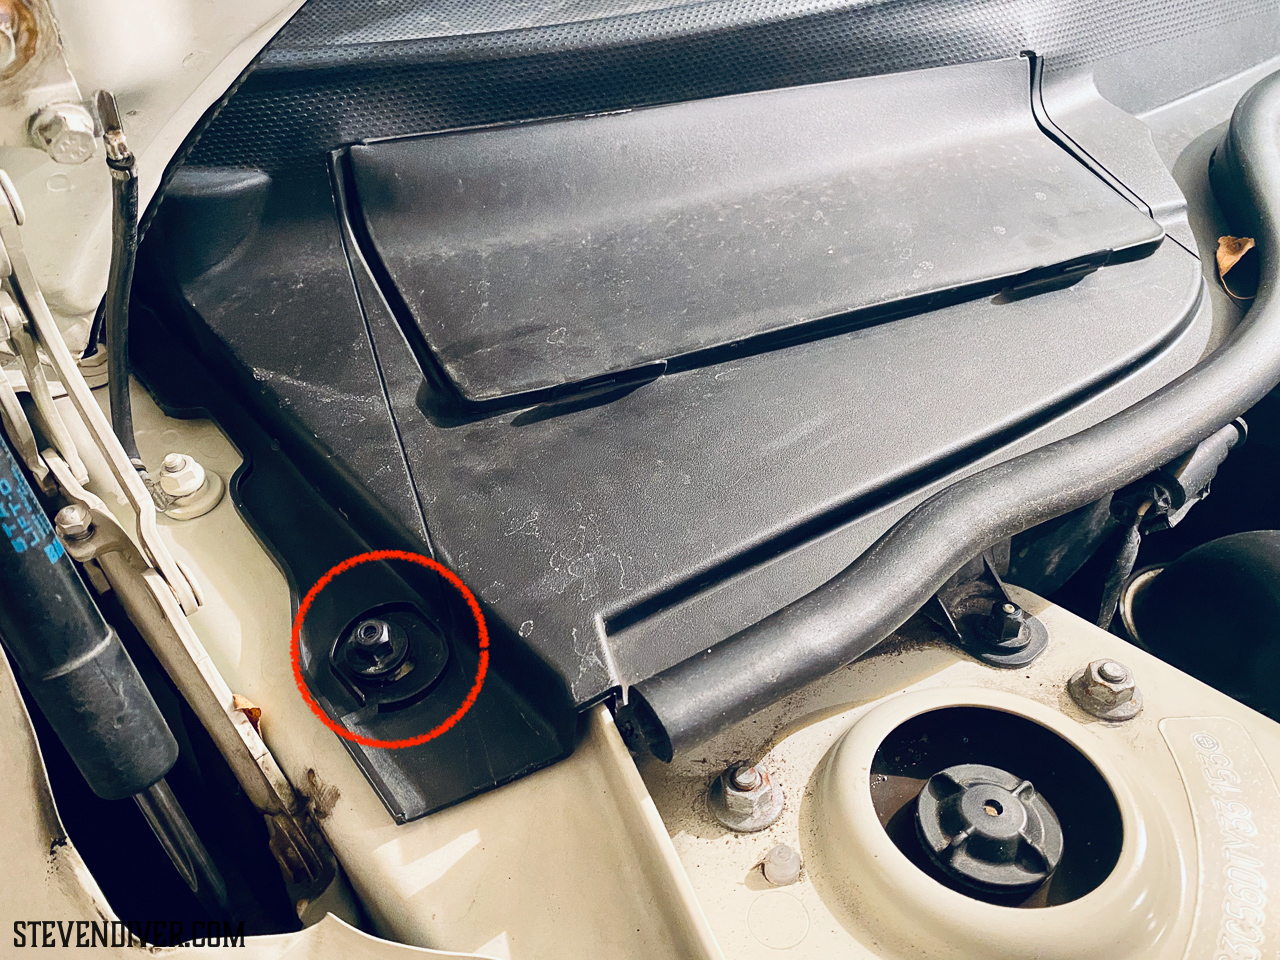
Step 2: Remove the Right Apron Cover (aka Battery Cover Panel)
MINI’s official name for it is the Right Apron Cover, but it’s the plastic trim piece covering the battery at the base of the windshield. It needs to be removed to gain access to the battery.
Locate the plastic nut on the left the panel cover, and remove it with a 10mm socket. Set the nut aside, where it won’t get lost.
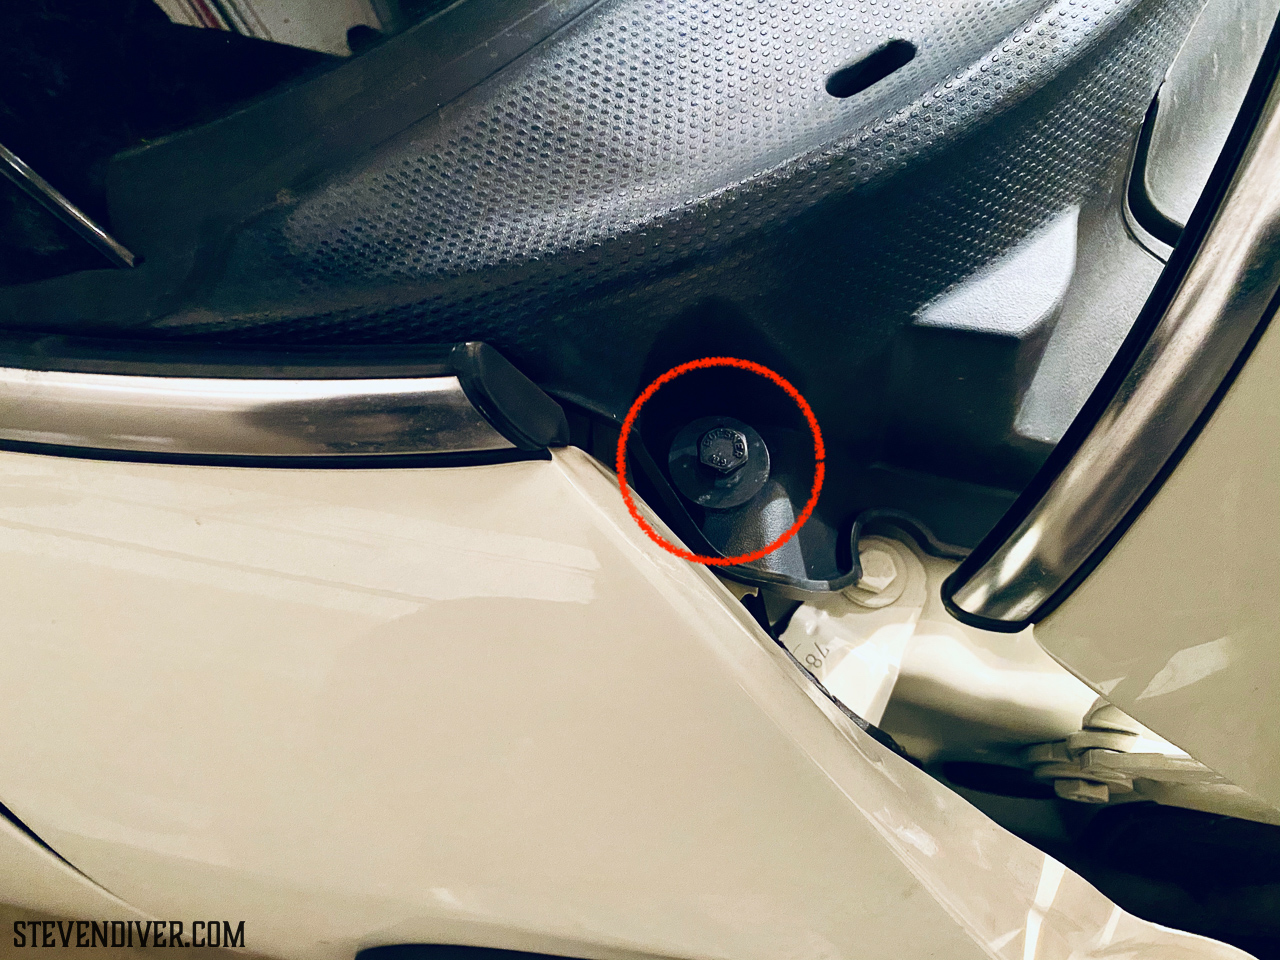
With the the hood still open, locate the bolt behind the hood (near the base of the windshield), and remove it with a 10mm socket. Set it aside with the plastic nut.
Peel back the weather stripping at front of the Right Apron Cover. At this point, the cover panel is held in by a few plastic clips along the front, and a long slot along the base of the windshield. With gentle, but firm, upward pressure, pull the front of the cover panel upwards to release the clips. To break the back of the panel free, more gentle but firm upward pressure will pop it loose. The cover panel can now be maneuvered free of the hood and windshield wiper. Set it aside.
Step 3: Remove Battery Hold Down Bolt/Bracket
With the Right Apron Panel removed, the battery compartment is now fully accessible.
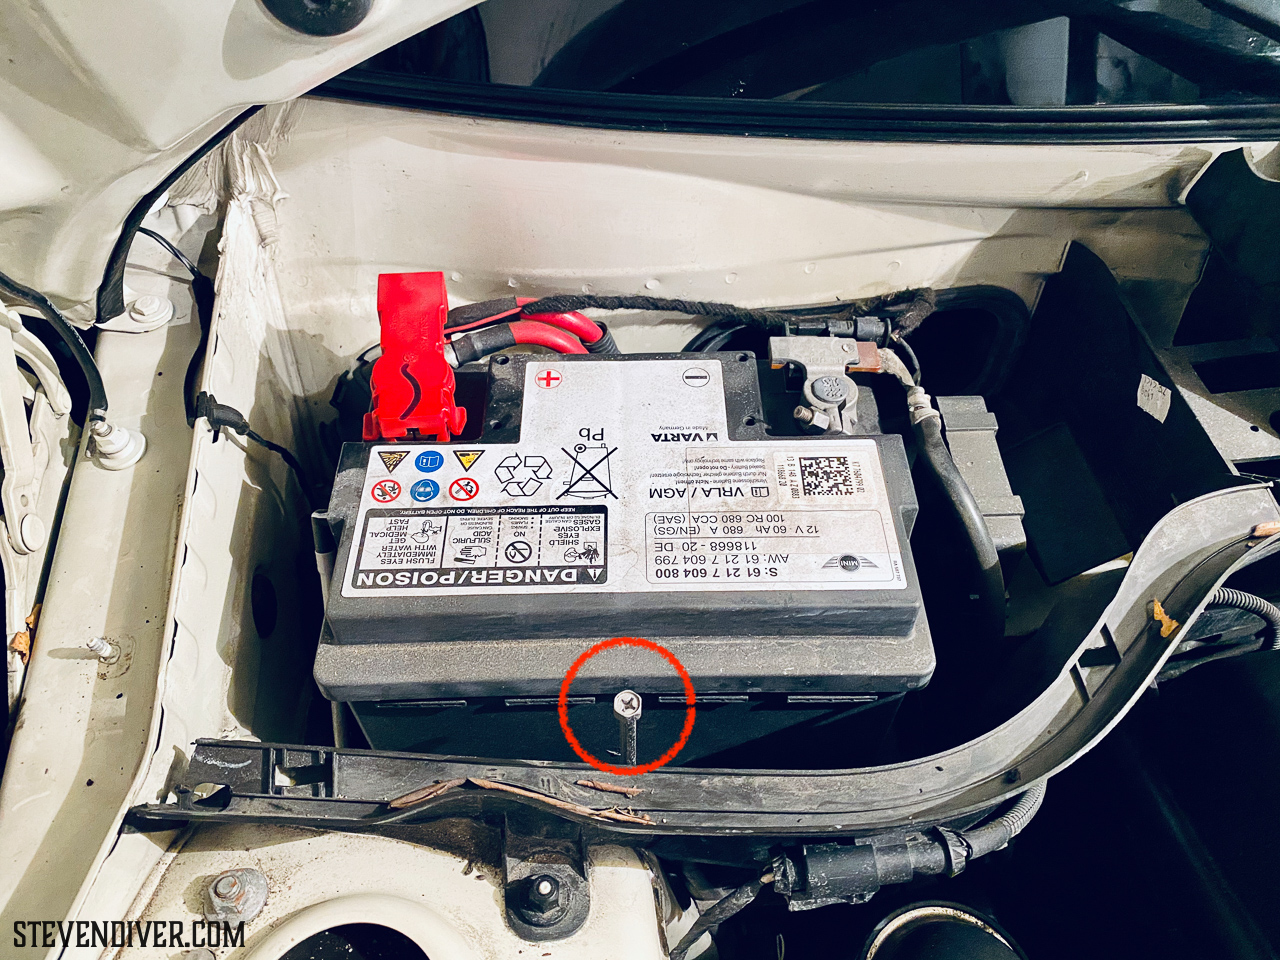
The battery is held down by a bracket, which clamps the bottom of the battery to the battery tray. A long battery hold down bolt secures this bracket/clamp in place. Remove the battery hold down bolt at the front of the battery with a 10mm socket, and set it aside.
Step 4: Disconnect & Remove the Battery.
IMPORTANT NOTE: When disconnecting the battery cables, ALWAYS disconnect the negative (BLACK) terminal first, then disconnect the positive (RED) terminal second. This prevents a short circuit if you accidentally touch a terminal, which could in term do some nasty damage to your vehicle’s electrical system. When reconnecting a battery, the reverse is true…connect the positive (RED) terminal first, and the negative (BLACK) terminal second.
The battery cables can now be disconnected. I like to keep a small towel handy to place over the battery terminals as the cables are removed to prevent an accidental short circuit or sparking.
With a 10mm socket, loosen the nut on the negative (BLACK) battery cable first, slide the cable/clamp off the battery terminal, and move it out of the way. Cover the battery terminal with the towel. Then loosen the nut on the positive (RED) battery cable second, slide the cable/clamp off the battery terminal, and move it out of the way. Cover the battery terminal with the towel.
Once both battery cables are disconnected, remove the battery gas vent tube. I was able to wiggle and rotate the elbow connector, and pop the tube out pretty easily. Just be careful, the connector is plastic.
Now the battery is completely disconnected, and can be lifted out of the battery tray, and removed from the car. Take care when lifting the battery…you’ll be in an awkward position when lifting it, and it can weigh over 40 lbs.

Optional Step: Replace Cabin Filter
With the battery removed, you now have full access to the cabin air filter. Now would be a good time to replace the filter if it has not been replaced in a while. I completely forgot about it, so I get to go back and do all this again at some point in the near future.
Step 6: Install New Battery & Reconnect/Reinstall Everything
Install the new battery, reconnecting and reassembling everything by following the steps above in reverse order.
IMPORTANT NOTE: When reconnecting battery cables, ALWAYS connect the positive (RED) terminal first, then connect the negative (BLACK) terminal second. This can prevent a short circuit if you accidentally touch a terminal, which could in term do some nasty damage to your vehicle’s electrical system.
Registering the New Battery
Once the battery is reinstalled and reconnected, it can be registered to the car. Using the Carly software, and Carly Universal Adapter, the process is quite simple, and only took about 5 minutes.
To get started, connect the Carly Universal Adapter to the OBD2 port in the driver side footwell (lights on the adapter will indicate it’s connected).
Put the key in the ignition, and press the START button to turn on the ignition (without starting the engine).
IMPORTANT NOTE: NEVER register a new battery with the engine running…the key should be in the ignition, and ignition in ON position.
On your iPhone (or Android phone), launch the Carly app. Tap Connect to connect the app to the Carly Universal Adapter. It will take a moment to establish the connection.
Once connected the adapter is connected, tap Features, then navigate to Battery Reset. In the Register Battery Menu, tap the appropriate button to register the new battery…
- Register same battery – For registering a new battery of the same capacity as the battery it is replacing.
- Register new type battery – For registering a new battery with a different capacity than the battery it is replacing.
As my new battery had a larger capacity than the OEM battery, I selected Register new type battery. Follow the on-screen prompts, until you can select a battery type. I selected the 70Ah AGM battery type (as that is the capacity of my new battery), then tapped Register to register the battery. After a few seconds, an alert popped up telling me the battery registration was successful, to turn the ignition off, and start the car to complete the registration.
That is it…the new battery is registered with the car.
Note: I will try to get some photos/screenshots of the Carly process, and update this post. It was after 9pm as I was finishing the replacing the battery in my Clubman, and I just wanted to get things finished up, so I didn’t take any photos of the registration process.